Ok, so first off, there is going to be a lot of bragging on my husband here. I can’t help it, he is pretty awesome. But, without him, there would be no craft room to share! This is also going to be a long, picture heavy post.
When we moved in together, he knew that I was a “stamper” but wasn’t quite sure what it all entailed. He most certainty didn’t know the amount of stuff a stamper collects. I had stamped for years, but due to circumstances, had most of it boxed up, or sold (gasp!). I didn’t have time to stamp any longer, and honestly, after being on design teams, was kind of burnt out on it.
I learned that his mother had an interest in stamping also, so that rekindled my interest! OH! I can blame it all on her!!! 😉 I started pulling stuff out of boxes, and I think my husband was mildly (a lot!) surprised at the amount of things I had.
Shortly after, he decided that I needed a space of my own. Yes I did! I was set up in a portion of our semi-finished basement, with a folding table, cruddy lighting, and an old shelving unit for storage (his grandfather built it, it is actually pretty cool). We checked out Craigslist, and found a set of white kitchen cabinets. They were at a good price, were already white so we wouldn’t have to paint them, and there were a lot of them. So we bought them, and stored them in the basement until we got around to installing them.
Then… our basement flooded last fall. Ugggg… the water wasn’t deep, an inch or two at most. But enough to cause complete havoc. Everything came out of the basement and we spent a lot of time cleaning it up. It was around that time that my husband decided that he was going to build me a craft room. The basement was cleaned out already, we had the cabinets, there was no reason not to.
My Christmas present last year was the craft room. He worked for two months straight down there, before and after work, and on his days off. I wasn’t allowed down there at all. It was HORRIBLE, sitting upstairs, hearing hammering, saws going, etc, and not being able to see. I did pick out the paint color, and was down there once or twice while the ceiling lighting was being put it. But that was it until Christmas morning!
He had been checking out my Pinterest board (like every crafter, I have one with dream craft room ideas), Googling craft room ideas, talking to people. He put SO much thought into it, it is just amazing!
Then for this Christmas, my present was the craft table. It took my husband about a month to build, working on it a few days a week. He even laid the laminate top. It is nothing short of stunning. It is HUGE… approximately 12 feet long and 5 feet wide. There is room for 6 to fit more than comfortably, 4 power strips built in (accessible by everyone), 3 long shelves at each end, 4 long shelves under it, and 12 small shelves on each of the long sides. In addition, there are 4 garbage cans built in, under the table. I can’t express how much I love it! In the week that I have had it, it has proved invaluable! One little note, you might notice that the edging isn’t complete on it. The laminate for it has been on backorder and will hopefully be here by the end of month.
There are 13 can lights built into the ceiling, all with Ott lightbulbs in them. That has made such a HUGE difference! The lighting is incredible in there!
Onto pictures!! Please bear in mind, it isn’t 100% clean. I have various projects that I am in the middle of.
Our basement is a large L shape. My husband’s workshop is in the small part of the L. When you come down the stairs into the basement, you first come to his workshop. You walk through, and this is the first view of my craft room. I smile every time I walk in!
(ETA- I added details about the building of the table HERE)

To the right, out of the shot, is small sewing desk in the corner, a rocking chair that you can kinda see (garage sale find, for $20. Total score!), and a 5×5 Ikea unit that I also received for Christmas this year. Notice the bow still on the table (there is also one on the Ikea unit lol).
View from the far end of the room…

I love the minions on the wall. They make me laugh lol He put those up before letting me in the room and I love them! The 3 inset shelves hold a variety of things. The top shelf hold a few of my “weird” things… a zombie baby (I know…), Doby from Harry Potter, some of the talking Minions from McDonalds (that our dog learned quickly that when he barked he would set them off. The batteries are now dead thanks to him!). The second shelf holds my Big Shot and accessories, a bin of dies and embossing folders. The third shelf holds most of my Stampin’ Up 8.5×11 paper. I sit right in front of the shelf, so it is easy for me to turn around and grab what I need.
Close up of that area and my Ikea cart…

I use magnetic spice racks to hold smaller embellishments, sequins, buttons, brads, etc.
The cabinets and counter at the far end…

The cabinets look pretty good for CL finds don’t they? The counter top is actually wood flooring. I saw that idea on another blog last year and loved it. If anything happens to a piece, it is a whole lot easier to pop that piece out and replace it, instead of having to redo a whole counter top. From what my husband said though, it was a royal pain to do. So while it looks great, and has held up SO well for over a year so far, I don’t know if I can suggest doing it, due to the amount of work it was.
He built the shelves between each set of cabinets, great of displaying some of my favorite things! Under the cabinets are Ikea kitchen racks. I had these years ago in my old craft room (just a spare bedroom, nothing like this) and loved them. I am so happy I have them again!
I sit in the middle to do embossing and painting. I have a small Ott light there that gives a bit more light when needed. I’m hoping to update to some good under cabinet lighting soon. The cabinets on the left hold painting supplies (Acrylics, oils, watercolors, etc). The one in the middle holds embellishments on the left side, and mailing supplies on the right. The far cabinet on the right side is misc stuff. Glue gun, tools, etc.
When he redid this room, he also installed outlets above cabinet height. Makes it SO easy for me to plug things in. The neatest part of that? One of the outlets includes USB plugs, so I can charge my phone, iPad, etc while down there.
The REALLY nice thing about the lower cabinets? Each one has a large pull out shelf. SO nice! The one on the left holds chemicals, large bottles of paints and adhesives, and cleaning supplies. The one on the right holds misc larger items that I can’t fit anywhere, canvas of different sizes, 9×13 pads of watercolor paper, a huge paper trimmer that I never use but can’t seem to get rid of, and more.
On the wall to the left of the cabinets are these Ikea picture shelves.

They are perfect! They have a small lip on them, so they hold spools of ribbon perfectly. My husband originally put 4 of them up when he built the room. I store so many things on them, that we went back for a few more.
To the right of the cabinets is my wood mounted stamp storage.

He built all of these floating shelves, and I love how he put the cassette holder (i.e. ink pad storage!) in the middle!
To the right of that are two Ikea 2×4 units…
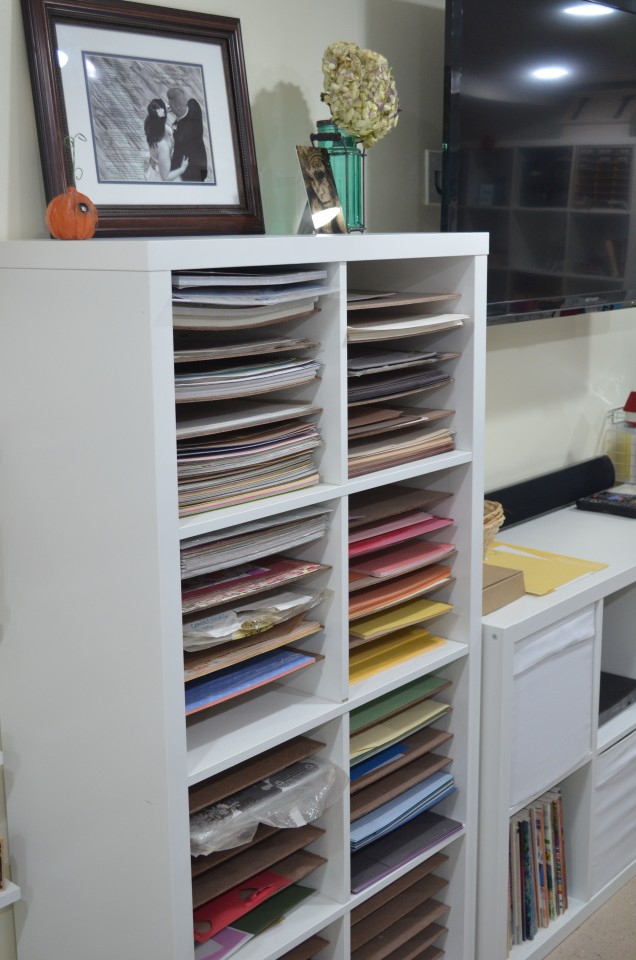
GUYS! He built me 12×12 shelving on one of them! Yes, my paper storage is a mess right now. I did have the solids organized. See the R.O.Y.G.B.I.V. organization on the right? On the left is a jumble of patterned paper. It is in serious need of sorting.
There is another unit that is next to that, I missed getting a good photo of that. It just holds books and magazines, one of those white bins is FULL of unmounted rubber from my design team days. Another is full of non Stampin’ Up paper scraps.
Then there are my Ikea CD/DVD storage units.

I love these for storing stamps. You can see my Stampin’ Up stamps there, old SU wood mounted stamps, then a ton of CD cases with other companies stamps. Years ago, that is how I stored my unmounted stamps. I just haven’t gotten around to changing it over to DVD case type storage yet.
These units have a story though. My husband and I went to Ikea one day and were looking at these. I knew that I needed more than one or two, but didn’t want to pay $39 a piece. I figured that I would just buy one a month or so until I got 5 or 6 of them. The next day, I went onto Craigslist to see what I could find (we love CL!). Very first listing? These 5 units. They had been posted about 10 minutes before I searched for them. The cost? $20. Not each, but for all of them! $4 a piece. SCORE! I emailed the guy right away, and picked them up after work that night. They were birch, but my husband is a master with paint. A week or so later they were bright white and in my room. I hope to eventually get 3 or 4 more, but am holding out for another good deal.
On the floor there is our dogs bed. He tends to go where I go, so one of the first things I did was made him his own bed (simple! Took two old pillows, sewed them together, then sewed a big pillow case for them. The case removes so I can wash it). That is his teddy bear on it, he curls up and sleeps with it, no joke. It is one stuffed toy that he hasn’t ripped apart within 10 minutes. That basket holds his toys that stay down there.
If you haven’t noticed, all fabric is the same. My husband found it at Hobby Lobby when he was doing my basement. He even reupholstered the stool at the counter and the chair at the sewing desk with it! A few months ago I needed more. We found out that it was discontinued. But my husband doesn’t give up. He called around and found one Hobby Lobby that still had some. He bought all they had left (around 4 yards). That fabric is now hiding behind the rocking chair below so I can make cushions for the chairs at the table.

Also hiding back there is some batting for a quilt that I am making (for the past three years… sigh) and some fluff for our couch. I need to refill the cushions. That pillow is from the couch too lol It is waiting to be refilled as well.
Finally, on the wall to the right where you walk into the room is the Ikea 5×5 unit I mentioned earlier (with the bow on it!).

As you can see, it isn’t filled yet. I have my Stampin’ Up punch storage in there (From Stamp-N-Storage), that is about all that is in the spot it is staying in. I have cards on display that I have recently made, a bin of Stampin’ Up cards for display boards, another bin of cards that I have made in advance sorted by theme (holiday, birthday, sympathy, etc.), my Paper Pumpkin kits, my skeleton cat… ya know, normal stuff lol Over the next month or so I will figure out how I want to use the unit and start filling it up.
You can also see a peek of my husbands work room. He built it a few months ago and it is wonderful! I love having him down there working while I am. We can still spend time together while doing our own thing.
Notice how yellow the lighting is in his room compared to my room? We need to switch his lighting over to Ott lights as well. Think that is our next project. He deserves it 😉
Finally… this is our dog, Opie. My husbands best friend and my furry baby boy. I was talking the photos last night, and he was down there with me, following me around, yapping at me. I figured that he needed a photo as well!

The main colors of the room are white, teal, and yellow. My husband painted most things to match the teal (including the cart, the table, some frames, the chandelier, the Harbor Freight spinning tool cart on the table, and some other things). Yellow isn’t represented much, but soon we will be painting a few things for accent.
The floor is just painted concrete, from the previous owners. We are trying to figure out what to do about that currently. I would love hardwood! Don’t know how logical that is since there is regularly paint, ink, etc flying around the room lol Suggestions?
There you have it! If there are any questions let me know. I will be happy to explain anything further. Just leave a comment or email me at InkItAll@yahoo.com
Have a great day!

What did you use to make your craft table? I am wanting to convert mine to that height.
LikeLike
My husband custom built it. Started as a huge pile of wood in our garage 🙂 I can get you the exact dimensions if you would like though. He had a basic plan he found online, but the customized it for my needs.
LikeLiked by 1 person
I think this is very awesome sewing station. I love to try to make this Thanks for the photos.
LikeLike
Would love if you shared. Your space is just awesome.
LikeLiked by 1 person
The information on the table? I sure will! It will take a couple of days, but I will have an “update” post, answering a lot of the questions that I received, as well as more details on the table. 🙂
LikeLiked by 1 person
What a wonderful room…..your husband is a true blessing !!!! And I love the name “Opie” for a dog. May you enjoy lots of fun times in your “designated area !!!” ……. I signed up for your email notifications …..
LikeLiked by 1 person
Thanks so much!! 🙂
Opie is named after my favorite character from Sons of Anarchy lol Though most days he is Dopey-Opie. We wonder if he has 2 brain cells to rub together sometimes. Good thing he is cute 😉
LikeLike
What a beautiful room, love everything in it! You are a lucky girl!
LikeLiked by 2 people
Beautiful and AMAZING!!!! You have every right to brag!!! He did an amazing job!!!! I see LOVE when I look at your pictures!!!!! God Bless!!!
LikeLiked by 2 people
Holy WOW! That space is awesome. Someday…someday…when there are no more kids in my house, I might be able to have a room that amazing. Kudos to your very handy hubby (I love mine, but putting together shelves from Ikea is about as handy as he gets)!
LikeLiked by 1 person
Oh my goodness, you are most right your hubby is a keeper what a fabulous space to create in!
LikeLiked by 1 person
You sure are lucky to have such a wonderful husband and mother in law.
LikeLiked by 1 person
I’m VERY lucky!! 😉
LikeLiked by 2 people
LOVE, LOVE the island space. I could cut and create and still have available work space along with the scraps and mess. LOL. Hubby is definitely a keeper.
LikeLiked by 1 person
What a blessing! Your room and your great husband!
LikeLiked by 1 person
This is amazing! What a wonderful place to craft. He really thought of everything!!
LikeLiked by 1 person
It’s a wonderful to work on projects! Love it!
LikeLiked by 1 person
Your hubby is a definite keeper. He’s also supportive and a plus to your space.
What a blessing you have in him!
Your space is amazing! He did a wonderful job!
LikeLiked by 1 person
Holy Moley! You are one blessed woman and your hubby loves you a whole lot! Now….how can I make mine realize he needs to do this for me?
LikeLike
I would try the carpet squares — would warm up the floor and it you have an accident —- just pull out the affected tiles & replace.
LikeLike
I think that’s the direction we are leaning 🙂 Thanks!
LikeLike
great work hubby! My hubby did something similar for my craftroom/work office this xmas and added LED lights with an auto on/off so I don’t have to turn on any lights when I walk in the room.
SO awesome! Thanks for sharing.
LikeLiked by 1 person
An idea for the floor. You can get ceramic tile that LOOKS like wood. Give you the look you want with the clean up factor you need… Love your space! Working on mine currently. I need to explore Ott overhead lighting options! Never even thought about it!
LikeLiked by 1 person
Love this idea!! Thanks!!
Ott lights are amazing as overhead lighting! They can replace any regular bulb, no OttLamp required 🙂
LikeLike
Love, love, love your room! Have many happy hours in there……. If you love the look of hardwood but want something durable consider a restaurant grade laminate flooring that looks like wood. It comes in planks just like wood flooring and goes down like wood flooring. People can’t tell that it isn’t wood. My house was done in tile and I pulled all of it up and put this down. It’s waterproof, odor resistant (I do dog rescue) and it has a 50 yr warranty. I absolutely love it!!!!!
LikeLiked by 1 person
I adore your craft space and how much love and care your husband took making it for you. That is so incredibly special! And oh my gosh at Opie – what an adorable lovebug! ❤
LikeLiked by 1 person
WOW – awesome space! Love it when a crafters significant other supports their hobby. Your husband did an amazing job creating you a dream work space. Craft on my friend.
LikeLiked by 1 person
Useful information. Lucky me I found your website by accident, and I am shocked why this coincidence didn’t came about earlier! I bookmarked it.
LikeLiked by 1 person
I’m so glad you found it!! 🙂 Let me know if you have any questions!
LikeLike
You seem to really know who you are. Your write ups are shocking. How could any of this be better stated? It could not. I truly think this page needs much more consideration. I will probably be again to read much more, thanks for that info. This will definitely be very useful for me when I get a chance to start my post.
LikeLike