Good morning!
I hope everyone had a wonderful weekend!!
Bear with me today, I have a tutorial for you guys. It looks complicated, but trust me, SO easy when you get the hang of it!

Ignore the mess behind it 😉
Isn’t this pretty?? I had so much fun making this! Like I said, looks complicated, but it is a breeze to put together.
Materials Needed:
8.5×11 piece of patterned paper or cardstock
Score Board
Bone folder
Strong adhesive (Tear & Tape works perfectly)
Scissors
Instructions:
Using your Score Board, score at 1/2″, 1″, 1.5″ and 2″ on each side of your cardstock.
Go back, and score at 2.5″, just 1 inch down
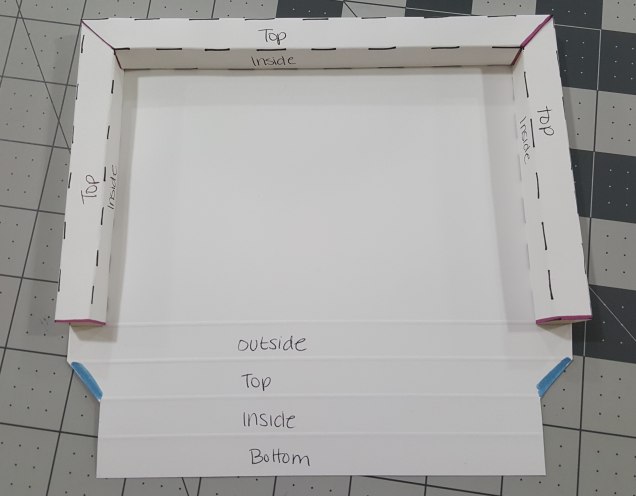
The slashed lines in the photo below are where you score and later fold.
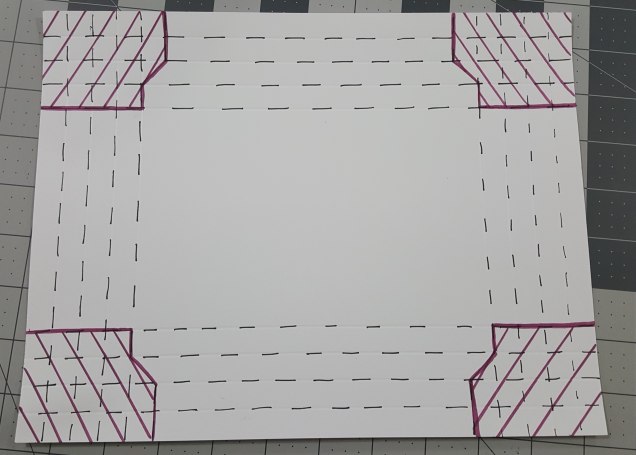
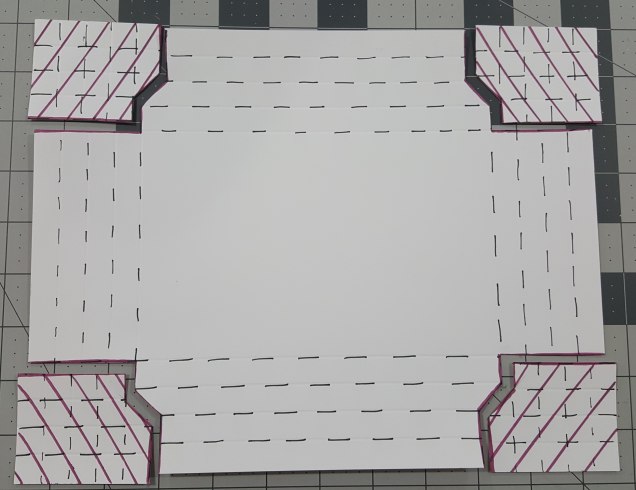
Cut out the corners where the photo above has purple solid lines. The photo below shows the cardstock after the corners have been cut.
Apply your adhesive where the blue lines are in the photo below. Don’t remove the protector sheet over each piece of adhesive until you are ready to put it together.
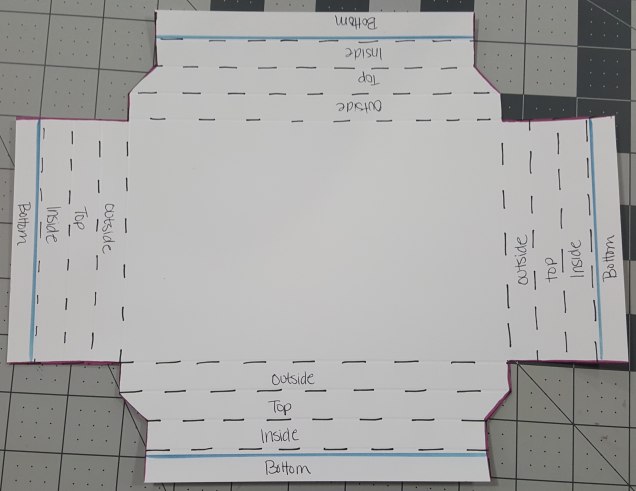
Hint: Try to get the adhesive as close to the score line on the bottom as you can, without going over the score line.
I wrote “Outside, Top, Inside, Bottom” on each line so you would have an idea of what will be showing when you start folding it to put it together.
Flip it over, and apply a tiny piece of adhesive where the blue lines are below.
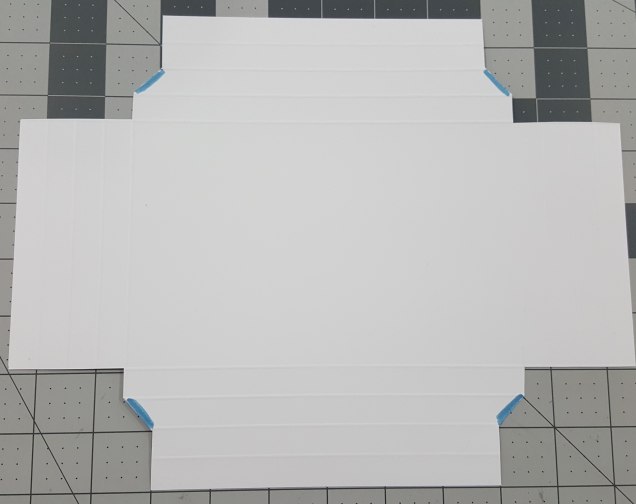
Carefully fold on each score line, just to get the creases going. It is easier to do this now, rather than after you remove the protective film off of the adhesive.
Remove the tape from just the short sides! Carefully fold one side at a time over itself, forming a long rectangle. The adhesive should be on the bottom, and you can carefully push down on it, adhering it, or use a stylus, pencil, etc, and gently insert into one of the open ends and push down. That will help make sure that it is really adhered!
Again, make sure you do the two short sides first!!!!
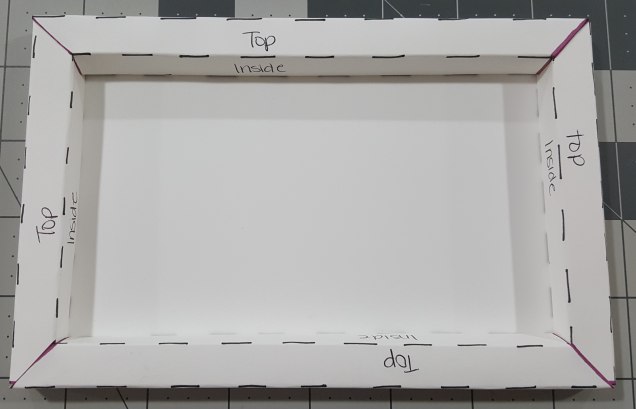
Now, remove the adhesive from the long sides, as well as the short sections (where the blue is here). You will fold it over just as you did with the short sides. You might need to wiggle it all together here, especially on the corners, to make sure the corners meet up properly.
It should look like this when you are done!
Now, if you are using two sided cardstock, make sure that you keep in mind which side will be showing for the frame and which for the background.
In my completed example, I used two sided DSP from our Neutrals collection. I really liked the side with the writing on it, but wanted something more neutral for the inside. I just adhered a piece of Whisper White Cardstock to the opposite side, for the inside of the frame.
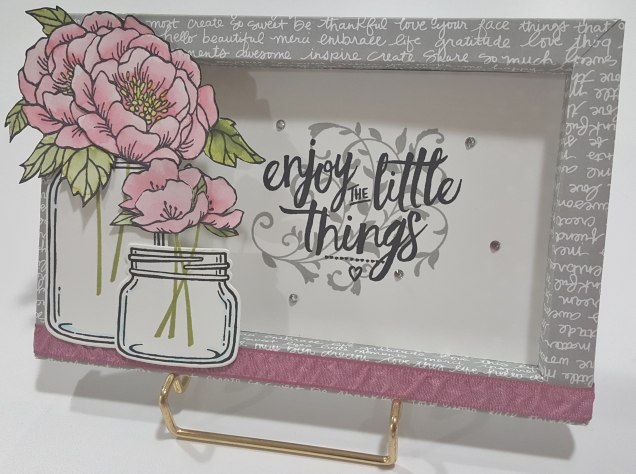
I love how this came out! It is currently sitting on our mantle at home.
If you have any questions, let me know! I will be happy to help out as best as I can!
Just a note for those living in my area, this will be a class in July! $10 to cover the price of materials. If you are interested, let me know.
A quick shot at what my table looked like while I was working on this…
I amaze myself sometimes at how messy I can get!!!!
Have a great day!

LOVE this one! Very pretty!
LikeLiked by 1 person
Thanks for sharing such a great tutorial for such a beautiful card. Now I just need to make one too!
LikeLiked by 1 person
Thank you for doing this in your class. I’ll be making more since there are so many ways to use this for different holidays!
LikeLiked by 1 person
Yes! I loved the diorama idea! 🙂
LikeLike
Love, Love the shadow box you taught us…I can’t wait to make more….
LikeLiked by 1 person
I am so glad Connie! And I am VERY glad that things worked out for you to join us 🙂
LikeLike