Weekly Deals are BACK!

SpecialOffers_Shareable-2_Sept2016_ENG.jpg

Good morning everyone!

Yesterday I hinted at some exciting news and decided to share a day early!

Starting tomorrow, for the next three weeks, the weekly deals are back!! Each Thursday for the next three weeks I will be sharing items that are available that week only for a price of 25% off normal pricing.

The Enamel Shapes are a GREAT item to keep on hand. Perfect to add the finishing touches to your project.

In my opinion, the Blossom Builder Punch is invaluable! It coordinates with the Bunch of Blossoms stamp set.Below are two cards I made with this set.

20160719_204112

Bunch of Blossoms 1

20160721_211746

Bunch of Blossoms 2

I don’t have the Embossing Folder yet, but you can be sure I will be stocking up on the ribbon. I am a sucker for a good neutral ribbon to use on my projects!

Remember, these deals start tomorrow, Sept 1st, so if you click on any of the product links today that are listed below, they will still reflect the normal price.

Have a great day!

Merry Christmas!

Good morning!

I am SO sorry that posting has been sporadic lately! My husband is now working 1st shift, previously he was on 2nd. I had a schedule that I kept to while he was working evenings to make sure that I was able to post at least three times a week. Now I am trying to spend time with him, cook dinner, watch Game of Thrones together (we recently got hooked and are trying to catch up!), etc. I am trying to start a schedule that will work for both of us, so bear with me until I get that hammered down!

I only had about half an hour last night to play, and grabbed our new Starlight dies to play with. Totally simple, but I love this die so very much!

20160829_195332.jpg

When die cutting our glimmer paper (gold here), it adds the perfect holiday sparkle!

I heat embossed the sentiment with our Gold Stampin’ Emboss powder.

The stars in the background were done just using Versamark! Like I explained in previous posts, when you stamp using just Versamark, it leaves a watermarked image. It ends up being just a shade or two darker than the cardstock you stamped on. Fun right?

The dashes at the bottom were die cut using one of the dies from the Detailed Santa Thinlits. There are two fun border dies in that set.

If you have your catalogs, get your lists ready! The Holiday catalog goes live on September 1st! I will also have some other big news for you on the 1st as well!!!

Have a great day!

1st Birthday Shaker Card

Good morning!

Last night I didn’t have much time to play, but needed to work on card for a 1st birthday party this weekend.

I got out the Number of Years stamp set, along with the coordinating Large Numbers Framelits Dies, and put together a plan.

20160824_211101.jpg

Totally simple, but fun I think! (Yes, I fixed the bow after I took the photos lol)

I used some new ribbon from the Holiday Catalog, as well as some of the pretty new sequins in the same catalog.

People, our Foam Adhesive Strips from our Annual catalog made putting together the shaker SO easy! So much better than lining up Dimensionals! They are nice and thin, you can curve them so easily, and there is very little waste. Win in my book!

pp_bogo_demo-header

Don’t forget about our current promotion! It expires Oct. 10th, so you still have some time.

More information is available HERE.

Finally, I am sure that you have seen the Thoughtful Branches bundle that is available this month only from Stampin’ Up! If you haven’t purchased it yet, you have until the 31st of this month.

If you need a bit more inspiration as to what to do with the bundle, check out Pinterest! There are SO many ideas there. Check out the search I did below…

Pinterest: Thoughtful Branches

That is all for today! Contact me with any questions.

Have a great day 🙂

Flourishing Phrases

Good morning!

Last night I put aside the items from our Holiday catalog to play with a bundle from our Annual catalog that I just love!

Flourising Phrases.jpg

These dies are so beautiful! I love that you can quickly make an impressive card using just the dies with this set.

Ingredients for this card are listed at the end of the post

2

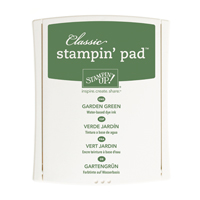
I die cut the large floral image from a piece of watercolor paper. Then using my Aqua Painter, I picked up a bit of ink of the lid of Garden Green and Sweet Sugarplum, and painted away! As usual, when I watercolor something I like to have the tones variegated. To me it gives a bit more visual interest.

*TIP– You really want to use the Precision Base Plate when using these dies. Trust me! I was lazy, mine was allllll the way across the room so I just used the regular sandwich. It was fine, if I would have ran it through 4 or 5 times lol The Precision plate is literally made to use with the very detailed dies. I should have known! So I walked my butt the 10 feet or so to grab my plate, walked back, and boom! One pass and everything was die cut beautifully!

The lattice was also die cut from watercolor paper. I did the same with my Aqua Painter, only made sure the color was more concentrated.  See it peeking out from under the piece of Sweet Sugarplum ruched ribbon?

I adhered the lattice and ribbon to a small piece of Whisper White cardstock, and stamped the sentiment in Garden Green. That panel was then mounted to a piece of Garden Green cardstock.

Finally the whole panel was adhered to a piece of Whisper White Thick cardstock trimmed to form an A2 card. Have you used this yet? Perfect for card bases!!

After everything was put together, I trimmed tiny pieces of our new Foam Adhesive Strips and placed them in various spots on the back of the watercolored die cut piece. Let me tell you, it was SO easy to do. There was no way that I would have attempted this with our Dimensionals, as fantastic as they are. It would have been a lot of trimming.

Here is a close up… if you look carefully you can see the tiny bits of foam adhesive strips.

1

This will be a hand delivered card, there is no way something this delicate would hold up through the mail! But I am sure that my intended recipient will enjoy it!

If there are any questions let me know. Have a great day!

Product List

Big Shot

$110.00

Haunted House!

Good morning!

My mom stopped by for a bit on Wednesday evening, and we played with the new Home Sweet Home thinlit dies as well as the coordinating Sweet Home stamps (great bundle!!).

The Thinlits contain a house shaped thinlit that you cut twice. Your paper ends up with little tabs on it, making it so easy to build your house. Fold on the score lines, adhere the tabs, and boom! You have a house!

20160818_182306

Now, because I used the brick patterned paper that is available in the Halloween Night DSP, if I would have die cut as usual, the sides of my house would have had the bricks crooked.

Instead I cut out each panel separately, so I ended up with 4 pieces of paper to form my house instead of two. It only took an extra few minutes to put it all together.

20160818_182311

The thinlits set comes with a total of *22* dies! One for the house, and the rest are accessories… different windows, doors, banners, shingles for the roof, bones (and a dog bowl to make a dog house!), the ghost, gumdrops (for a cute Gingerbread house!), and so much more. This bundle is so versatile.

20160818_182327

I hope you enjoy this as much as I did! SO much fun!

Have a great day!


Star of Wonder…

… Star of Light!

I always think of the Barenaked Ladies and Sarah McLachlan version of “God Rest Ye Merry Gentleman/We Three Kings” when I see that saying in this bundle!

Take a listen here

Is it as much as an earworm for you as it is for me??

Anyway! I finally sat down to play with this bundle

20160804_181857

It was so easy to create a fun card!!!!

PSX_20160817_093722(2)

Pretty right??

The background was done with Island Indigo and Perfect Plum inks on watercolor paper. I just wet the paper, then dabbed some Island Indigo onto it, letting the ink run as it wanted to. When I was happy with how it looked, I dried it using my heat tool. I then spritzed a bit more water, lightly, over the watercolor paper. Using an Aqua Painter, I dabbed bits of Perfect Plum here and there. Again, I dried it using my heat tool. Easy as that!

The snowflake was die cut from a piece of Dazzling Diamonds Glimmer Paper. It gives the perfect shimmer for winter projects.

20160816_210654

The rest was a breeze to complete, I heat embossed the snow in the background and the sentiment with White Stampin’ Emboss Powder (making sure to use my Embossing Buddy!). A few of our new sequins were adhered to the front to add a bit of extra sparkle.

The panel was then adhered onto a piece of Whisper White cardstock, then onto a piece of Island Indigo trimmed to form an A2 card.

Trust me when I say this was EASY! Anyone can do it!!

This bundle will be available September 1st, along with so many other fantastic holiday items! Wait until you see it all!

For my regular customers, you should be receiving the Holiday catalog in your mailboxes any day now!! Otherwise, I will be sharing the .pdf of the catalog on Sept. 1st. Anyone who places a $25 order with me will also receive one!

Let me know if I can answer any questions for you.

Have a great day!!!


My Paper Pumpkin- BOGO!

pp_bogo_demo-header.jpg

Happy Monday! I can’t believe that it is the 15th! The month is half over already. Time is flying by!

If you have been reading blog for a bit know, you have heard me mention My Paper Pumpkin a time or two (or ten).

The box of goodness comes to all subscribers every month, and it is so much fun!

You get an exclusive MPP stamp set, at least one ink spot that coordinates with the kit, as well as everything needed to make that months project- cardstock, adhesive, even envelopes! Heaven in a box I tell you!

Stampin’ Up is doing something they have never done before this month! For all new customers, you sign up… pay for one kit… and get the next months free.

Now, personally I feel that Stampin’ Up does a fantastic job with these kits. But they can’t please 100% of the people 100% of the time. For those times, you can go to the nifty Paper Pumpkin alternatives Facebook group. The extremely talented folks there share projects made with their kits, that are different than the suggested projects.

If you sign up for Paper Pumpkin, I will send you a link to join that group 🙂

The Fine Print:

  • This offer is for new subscribers only
  • New Subscriber must use the code BOGO at PaperPumpkin.com in order to receive this fantastic deal
  • Subscribers will pay the standard rate of $19.95 for their first month. The second month will be FREE. 
  • This deal is valid only if the subscriber does not cancel before their second kit ships. Feel free to cancel after you receive your 2nd box if you aren’t happy.
  • Not valid on pre-paid subscriptions (i.e. purchasing a 3, 6, or 12 month subscription)
  • Offer ends October 10th, 2016

If you have any questions, let me know!

Have a great day!!!

Spooky Fun!

Ready for another sneak peek (or two?).

Wednesday night I played a bit with the new Spooky Fun stamp set, along with the coordinating Halloween Scene Edgelits. To say that I am in love with this bundle is an understatement!!!!

20160810_213848.jpg

This card came together so quickly! That tree die is so much fun… I can see using it with so many different sets, not just Halloween. The background paper is from a new Halloween pack of DSP as well.

While this card is crazy simple, I did do a fun little thing for the moon. I didn’t want to just stamp it and leave it, nor did I want to stamp it on cardstock and fussy cut it.

Instead, I stamped it directly onto my Basic Grey background. Then using a sponge dauber, I tapped it directly into a pad of Whisper White Craft Stampin’ Pad. Very lightly, starting in the center of the moon, I rubbed the dauber in circular motions, working my way out.

This made the moon look like it was glowing!

*Tip- if you get too much ink on to the cardstock, you can buff some off using a soft cloth.

After, I had a few minutes left, so put the finishing touches on a tag that I started over the weekend.

20160810_213741

Cute right? The stars were die cut using a cute little die that comes with the Detailed Santa Thinlits. The sentiment as well as Santa’s list are from the Greeting with Santa stamp set.

If you want a closer look at the items used in both of these projects, check out my Holiday Catalog Haul that I shared HERE.

Have a great day!!!

Class Results- Thoughtful Branches

Good morning!

Just a quickie for you this morning. Monday night I hosted a class at my home, using just the Thoughtful Branches bundle.

My main objective was to show the ladies alternate ideas using this fantastic bundle. Just looking at it, you can see the trees, hydrangeas, etc.

But what about using the snow mounds as tree stems for a perky little bird to sit on?

Snowbank.jpg

Just flip it upside down…

20160809_184300

I used a black Stampin’ Write marker to connect the lines a bit, but how fun is this? It is so hard to get a picture of a plain white card! Here is a close up, where you can see the Woodlands embossing folder used for the panel behind the bird.

20160809_184310

How about using the beautiful leaves to create a pretty fall card?

20160809_184328

I also die cut a few of the branches with the leaves and trimmed off the leaves to use here.

Finally, just a fun Thank You card.

20160809_184346

*Tip! See the rectangular panel behind the main one with the wood-grain on it? That was done with just Versamark and the Hardwood background stamp! Versamark is fantastic for tone on tone stamping. It is sticky, but when you leave it to dry the stickiness disapears, leaving a beautiful watermark-like image. It will cause your stamped image to be just a few shades darker than whatever color cardstock you stamp onto. Fun right?

Thoughtful Branches is available only until the end of the month! It is an extremely versatile set that will find a place in any stampers home. You can check it out HERE.

I will leave you with this picture that I saw on Facebook last night… it actually made me snort a bit when I saw it lol

FB_IMG_1470800822128

Have a wonderful day!

Greetings from Santa!

Surprise! A post on a Saturday! I don’t do that much, but I just finished playing with one of the new bundles coming out in the Holiday catalog and I had to share with you!

How fun is this??? Now, I wasn’t intending on making anything really today, I just wanted to play. 

But I’m tickled with how this came out!

I used the Detailed Santa Thinlit to die cut 3 times using Basic Black, Red foil, and Dazzling Diamonds Glimmer paper. Then I spent way too long piecing it all together, (and trimming his mustache) and adhering all of the tiny pieces down. 

Our Fine-Tip Glue Pen was amazing for this! I was able to get tiny drops of glue exactly where I needed them without making a mess. Score for me! I’m the official Queen Mess Maker 😉

Here is a bit of a closeup so you can see the detail a bit better.

You can see a bit better the pink in Santa’s cheeks. I cheated here, I just dabbed the end of a small paintbrush directly into a Pink Pirouette then dabbed it onto his cheeks to add a touch of color.

Again, this was just playing so it isn’t perfect, but I had fun with it and wanted to share.

Hope you are all having an amazing weekend!